Catsear Wine

In a Bradbury sort of mood, I decided last week to make some dandelion wine. All the pretty yellow flowers were nodding their head in the yard and I thought “I’m going to do something with them.”

It never really occurred to me that they weren’t actually dandelions until Friday afternoon, when browsing some dandelion related resources, I came across mention of Catsear.

Catsear (Hypochaeris radicata) looks like dandelion (Taraxacum officinale), but has some differences in appearance. The leaves look a little different, and where dandelions grow a single flower per stem, catsear branches. However, it is edible, and it’s got a lovely fragrance. Looking it up netted me this result, which suggested to me that I could still get a nifty little alcoholic beverage out of my yellow flowers.

I have no idea how many flowers I managed to harvest. It was a lot, but I don’t have any kitchen scales, so I can’t say by weight. I managed to repurpose and fill a bucket that once contained 2kg of yoghurt. I could have got more, but I’m lazy.

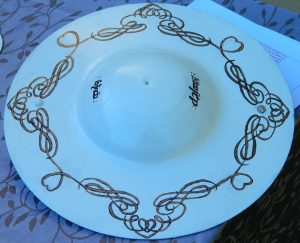
I then rinsed the flowers to get rid of wildlife.

Catsear flowers, rinsed.

Catsear flowers, rinsed.

Then I set to the tedious task of taking off the green bits.

Catsear minus stems and sepals

Catsear minus stems and sepals

I found that you can get into a nice rhythm of pinching the petals between your thumb and forefinger and simply twisting off the stem and sepals, but there were a lot to get through. I put on a movie and was halfway through it before I finished with the flowers.

Be aware that the sap stains your fingers. Hours after and following numerous attempts at scrubbing my fingers, I still look like I’ve been playing with dirt.

Catsear stains your fingers. This does not come off with soap.

Catsear stains your fingers. This does not come off with soap.

Having finished separating the petals out, I put them into a big pot of water and set it on to boil. I then went and checked various dandelion wine recipes and found that they suggest to put dandelions into boiling water then let it cool. Whoops.

Considering I put in approximately 3750 ml water, it took nearly an hour to come to the boil. Once there, I let it boil for about 5 min then turned it off and let it steep for 4 hours I should have left it longer, but I’m impatient, and I have visions of an irate husband complaining because I’ve left flower soup out for a long time.

Catsear steeping

Catsear steeping

I then strained out the solids, first with a metal seive to get the large bits, then with coffee filters to get the pollen and other smaller solids.

I then added a kilo of sugar into the strained liquid and put it back on to heat.

The liquid I was left with was straw yellow in colour, had a lovely, fresh aroma and tasted (to me) like a combination of wheat, grass and straw. I fed it to my unknowing stepdaughter, who looked at me suspiciously before taking a sip, then called out “Aw, hawhawhaw,” which left me wondering if she had burnt herself on the still hot liquid, then “I need to LIVE on this stuff!”

Liquid after straining

Liquid after straining

I’m now just waiting for the liquid to cool before adding yeast and putting it on to ferment. I’m hoping that delicious and delicate flavour is preserved long enough to feed to others at next year’s Great Northern War.


Edit, 25/10/2015: I didn’t get back to the brew last night, so it got covered overnight to stop the world from feasting on my delicious flower soup. This morning I put it on to warm, then put it into a 5l demijohn with a water lock. I’ve used BV7 yeast at the advice of my husband, who has played with it using apple, pear and blackberry ciders. (I was considering CL23 but was informed by him that the flavour would drop considerably). Vintner’s Harvest tells me that the ethanol will top out at about 13%, so it’s not going to run anywhere close to the “rocket fuel” that he regularly produces.

The brew has been relegated to our “brewing box” downstairs: a large insulated box we acquired a few years ago from a friend. I feel a little sad locking my brew away (I like to be able to look at the yeast moving around, and be able to see the pressure and watch the bubbles) but as we’ll have a house full today, ’tis safest.

5 litre Demijohn containing future alcohol

Yeastie-beasties Ahoy!

Story Stones

I’ve just made two sets of Story Stones. One set I will gift to Stegby at the up and coming Feast of Friendship, the other set is for me, as part of my bardic bag of tricks.

So what are Story Stones?

Story Stones

Every stone has a word, and every word is the seed for a new story

Put simply, they are a creative lubricant. Basically, it’s any number of stones in an appropriately sized bag. On each stone, there is a word. Most of these words are nouns… places, people, animals, things. I’ve added some colours in too, just in case.

The idea is to draw out two stones at random, then to ad-lib a story featuring those two things.

I tested them out on myself this afternoon. I picked out “Eagle” and “Lizard”. There, in front of my husband and my step-daughter, I created the following short story:

The Tale of the Eagle and the Lizard

Once upon a time, there was an eagle. He was flying along on a nice day, feeling the wind ruffle through his feathers, thinking how good it was to be an eagle.

At the same time, a lizard was out having a bask. He was enjoying his life, lying there on his favourite rock, feeling the sun on his back, thinking how good it was to be a lizard.

The eagle happened to look down and see the lizard, lying there on a nice, exposed rock. “Hmm, I’m a bit peckish,” he thought, and decided that the lizard would make a fantastic lunch. So he swooped down and grabbed the lizard.

The lizard, who had been nodding off, woke suddenly and saw the ground slipping away underneath him. “Wha…. What’s going on? Where am I?” He looked up to see the eagle. “Who are you?”

The eagle looked at the lizard briefly. “I’m going to take you back to my nest and eat you for lunch,” he explained.

The lizard didn’t like the sound of that. “Wait, wait, wait,” he said, “You don’t want to eat me. Look, I’m scrawny, I’m bony, I really don’t taste that good. But what if I said I could get you something that was a lot tastier, and would fill you up more?”

The eagle thought about it, and realised he really was quite hungry, and the lizard would probably only do for a quick snack. “What do you have in mind?” he asked.

“Look, see that bush down there?” The lizard pointed at a large bush hemmed in by some trees. “That’s where we need to go.”

The eagle looked down where the lizard was pointing. “I’m not to sure about that, I’m really too big to go into a space that’s got lots of trees like that. They get caught up in my wings.”

“Don’t worry. I can get you something much larger than me, but it’s there. You just have to drop me off there and I’ll go get it for you.”

The eagle greedily imagined plump rabbits and other yummy things to eat as he swooped down to the clear spot next to the bush.

“Stay here, I’ll be just a second,” the lizard called as he scampered into the bushes.

The eagle waited. And waited. And waited. After about ten minutes, he called out “What’s the hold up?”

But there was no reply.

Personal A&S challenge – The birth of alcohol

Since moving into the house I’m in, I’ve developed a passion for gardening.

In the same time frame, I’ve also developed an interest in brewing.

Gardening + Brewing means that I can create the things I then put in my brews.

So far I’ve done a number of different brews utilising herbs that I’ve grown. I’ve used home grown liquorice, lemongrass, lemonbalm, rosemary, tarragon and other flavour additives in my mash in the hopes of making everything just that little bit tastier. However, something I haven’t yet done is brew anything solely using things I’ve grown myself.

While drinking some of my ale about a month ago, I started to consider what sort of things went into medieval brews. I know that many ales were a combination of grains instead of the straight barley that I had been using. A plan formed in my mind… to have a personal A&S project that would take me all the way through brewing – starting at planting the crops.

Today I have segregated a bed specifically for grains. The spot gets shade in the early morning and late afternoon, but has nice, bright sunlight through the day. It’s not a large bed by any means, and I’m not expecting to have a massive crop, but I hope there will be enough to brew a decently sized batch of ale. I’ve planted a third of the bed with wheat, a third with rye, and a third with barley.

My new garden bed, planted with wheat, rye and barley

My new garden bed, planted with wheat, rye and barley

I will document the progress of the crop through the coming months.

Chirurgeon’s Baldrick

Th Great Northern War, I acted as a chirurgeon. This is not a familiar role, and not one I’ve done for the SCA before, but I have current first aid training for the first time since I was 15, so I figured it was a service that I was able to happily give. The only issue was, there was no regalia to be had. Hrothgar lent out his baldrick, but that was problematic in and of itself. Hrothgar is one of only 7 mentor chirurgeons in Lochac, and his regalia is bounded in gold, not white.

To this end, I decided to make some regalia. I intend to donate it to the first aid box at Riverhaven. This way, they will always have regalia for the chirurgeon on duty.

Chirurgeon's baldrick

Chirurgeon’s baldrick

The embroidery has been done in cotton, stem stitch. The baldrick itself used some reasonably heavy-weight red cotton, bounded on each side of the fabric strip with white bias binding. It seemed easier to do it that way. I’ve simply stitched the inner, the outer and the white trim using a running stitch. This was great practice for me to get my stitches evenly spaced and consistent. I’ve already had someone tell me it looks like I used a sewing machine, which makes me most proud. It’s a bit ragged where I’ve stitched the white teardrop on, but I’m considering attaching the teardrop in a different manner for my next attempt (which will go to St Florian de la Rivere).

Because everyone should be able to tell who the first aider is at an event.

Song: Three Mavens

In the lead up to Great Northern War, I’ve been thinking on the songs I’ve been packing away in my arsenal. I think that must have been seeping into my subconscious, because at roughly 2am this morning I had a song pop into my head, almost fully formed. I’ve worked on it through the day, and I bring you my song:

Three Mavens (to the tune of Three Ravens)

There were three mavens sat on a bench
Down a down they tore her down
Staring at a badly dressed wench
With a down
The one of them said to her friend
Look how badly that dress is hemmed
With a down truly truly they tore her down

That outer layer’s Florentine
Down a down they tore her down
But that chemise is from an earlier time
With a down
That’s a Viking circlet on her head
Why does she mix her period
With a down truly truly they tore her down

They called her over eagerly
Down a down they tore her down
And she stepped to those mavens three
With a down
She hoped for wisdom and new friends
They lectured her on fashion trends
With a down truly truly they tore her down

This fact will shock you and appall
Down a down they tore her down
The garb she wore was borrowed all
With a down
She quickly saw she was outclassed
Her first event shall be her last
With a down truly truly they tore her down

I’m releasing this song under a CC0 Waiver. For those familiar with Creative Commons, this is the least restrictive licence they supply.


CC0

To the extent possible under law,

Kristine Sihto

has waived all copyright and related or neighboring rights to
Three Mavens.
This work is published from:

Australia.

#47 Lucet

Some time ago, I came across an online image of a Viking line winder. You can find an image of the specific find here: http://www.pinterest.com/pin/511440101403969955/. Falling somewhat in love with the image, I decided to make lucet with similar markings. So I prepared a nice piece of beef bone and here’s the finished product at roughly half the size of the original find.

Bone lucet based on a linewinder found at Sømhovd, Norway

Bone lucet based on a linewinder found at Sømhovd, Norway


#46 Wooden Spoon

This was carved for an Arts and Sciences competition at the Stegby Feast of Friendship this year for an item for a feasting kit. I was lazy, I didn’t write up any documentation to go with the entry, so I lost to an unadorned Viking era horn spoon with awesome amounts of documentation. I’ve been asked to run a collegia on carving for Riverhaven, but I’m not really sure what I would talk about. Carving is what it is… you take stuff away until you have what you’re aiming for or until something breaks.

Mermaid Spoon

Mermaid spoon

This spoon was made in stages. I knew what basic profile I wanted it to be, so I drew that onto the block of wood (which by the way is acacia). This was using a hand saw with a cylindrical blade. Then I cut the profile from the other direction. I cheated with this one… I used a cutting disk on a dremel.

Spoon bowls are annoying to carve out. I started by hand, got sick of that, then used the dremel, and eventually finished off with a gouger once I had it to almost the right depth.

After a fair amount of sanding, I had a shape I was pleased with, at which point I started worrying about details. I carved striations into the hair, individual fingers, and used a small gouger to mark her tail with scales.

Closer image of the mermaid's hair on the spoon

Closer image of the mermaid’s hair on the spoon

The reverse of the spoon shows that she has breasts.

The reverse shows the feature most often attributed to mermaids…


This closeup shows detail of the tail's scales

Spoon detail of the tail

I am a little disappointed that I encountered a couple of borer holes in the course of carving, but as I didn’t come across them until fairly late in the piece, I decided there was nothing to do about it, and set to polishing. That was the end of my work on the spoon prior to its entry into the competition.

At this stage, I’ve decided I need to continue work on my mermaid. I haven’t done a lot of work with wood before, so the polishing has been mainly hard work and very little in the way of cutting compounds or sealants as I didn’t want to run the risk of contaminating the wood. Using the spoon once has convinced me that I need to seal the wood before using it again. So it’s time for me to look at food-safe options.

#45 Antler Needlecase

At the Abbey Medieval Festival, I managed to pick up an antler. I’ve never worked with antler before, and I’ve wanted to try it for a while.

Logistically, I had never really considered the fact that antler is made of bone, not of horn. This is a fairly important distinction when carving something, as bone is spongy on the inside. This immediately put paid to a number of ideas I had regarding said carvings, as much of what is inside the antler is useless for making anything out of. However, the tip of the antler is quite useful for my first project: a needlecase.

I cut the tip of the antler off at what seemed a reasonable distance, then cut another smaller section in parallel to the first cut. I hollowed out the tip using a drill, then with a rotary tool I carved the lid so it would sit inside the needlecase.

A few carefully placed holes for the hinge and clasp were the last bits. Then I polished it up and tied on the cotton hinge and clasp.

Antler needlecase

Antler needlecase


#44 Prince Bisket

Being the sort of person who wants to impress everyone every second of the day, when being asked to bring a plate for a colleague’s birthday party I decided to go all medieval on their feast. I said I would bring a sweet, then turned to the internet to save me.

I discovered this lovely site almost immediately and set to looking for something which a) seemed easy to make and b) didn’t require me stepping out of my house to find ingredients. Thus began my love of this recipe, Prince Bisket.

I have found two recipes for Prince Bisket. The first is the only one I have tried, as the second seems a little more involved.

The first recipe:

Hugh Platt p. 14/94 (attribution copied from originating site–I have not identified which of Platt’s works this recipe derives from)

Take one pound of very fine flower, and one pound of fine sugar, and eight egges, and two spoonfuls of Rose water, and one ounce of Carroway seeds, and beat it all to batter one whole houre: for the more you beat it, the better your bread is: then bake it in coffins, of white plate, being basted with a little butter before you put in your batter, and so keep it.

The second recipe: 

To make Prince Bisket

PERIOD: England, 17th century | SOURCE: A Daily Exercise for Ladies and Gentlewomen, 1617 | CLASS: Authentic

DESCRIPTION: A sweet bread or biscuit baked in a pie shell, or made like wafers

 To make Prince Bisket.

Drie a pound of very fine wheat flower in an Ouen two houres, after the bread hath beene drawne, or the Ouen being warmed, but not heated for the nonce, the flower were best in an earthen Pipkin couered, least it loose the colour, put to it a pound of double refined Sugar beaten and cearsed fine, then take ten new laid Egges, take away fiue of their whites, straine these Egs into a Bason, with a spoonfull of Rose-water, and sixe spoonfuls of scalded Creame, when you haue all in the Bason, first put in your cearsed Sugar, and let it dissolve by beating it into your Egs, then put in your flower by little and little, vntil both the flower and the other things be incorporated, beat it well together an houre at least, and you shall at last see it turne white, then you must have coffins of white plate indude with butter as thinne as you can, so as it be touched in euery place, then take an ounce and a halfe of sweet Anise-seed, and one of Coriander, dried rubd and dusted, put the Anise-seed in the batter, & the batter into the coffins, and bake it an houre at least if you will, you may make Cracknels of the same batter, driue it thinne vpon the Plates, and when you take it off, rowle it thinne like a Wafer, and dry them again in the Ouen.

What I did:

I saw the redaction on the first recipe then proceeded to ignore it completely.

Not wanting a large amount of food, I cut the recipe down to two cups of white flour and one cup of white sugar and sifted them together.

I took two eggs and put them into my blender for a few seconds. Then I put a decent splash of rosewater in with the eggs and blended it again. By decent splash, I’m talking somewhere in the vicinity of 1 1/2 tablespoons of rosewater. Then I tipped the flour/sugar into the blender with the eggs along with roughly 2 tablespoons of caraway seeds.

I blended all this together for a couple of minutes, using a spatula to push it down the sides a couple of times.

Once it was nice and smooth, I put small squares of greaseproof paper into a mini-muffin tray and put the mix into each section.

Then I popped the tray into a preheated oven at 180C for 20 min.

Prince Bisket

Prince Bisket: I forgot to take a photo until they’d been half eaten already.

They are delicious. The caraway and the rosewater really make this a flavour that’s unusual and morish. After trying the first one I was a little worried that the flavour might not suit the modern palate (particularly as I was feeding them to people who hadn’t experienced medieval foods before), but I’ve had multiple requests now for the recipe. I’d say that’s a winner.

Checking back in…

It’s been quite some time since I blogged here, and I haven’t been going to many events due (mostly) to time constraints, but that doesn’t mean that all has been silent on the A&S front. This being AS 49, I decided I need to get up and moving on my 50 things project, and to do this, I need to get up to date with my list. I previously was at Breadth challenge #27, so here’s my list continuing on:

28. My songbook has now expanded to include 55 songs, some of which are period and some not. This has been a depth challenge for me (and will continue to be ongoing… there are a lot of songs available  and a lot of pages in my songbook which are yet to be filled in.) I’ve got a YouTube channel where I’m gradually adding content. Due in part to bad speakers, another part to poor microphones, and a third part to the fallibility of my vocal cords, the sound is not always the best, but I believe it’s probably sufficient for other bards to pick up a tune from what I’ve posted. You can listen to me on this channel:   https://www.youtube.com/user/RevKristine

29. My wedding dress. You’ve already seen the fabric, here and here… the final product was entirely hand stitched to my own design. It didn’t entirely work the way I wanted, due majorly to my weight (and size) jumping all over the place while I was making the dress. However, I’m (mostly) satisfied with what I made, and apart from some minor freakouts on the day and the groom having a broken leg (that’s a story unto itself), the wedding went well. I’ve since used the dress at an event, and now that I am fatter, it fits me a lot better.

My wedding dress, from my own design.

My wedding dress, from my own design.

30. My wedding cake. This was made entirely of gingerbrede with marzipan icing. I will admit to buying the pink flowers on the cake, but am particularly proud of my own marzipan roses.

Wedding cake made on gingerbrede and marzipan

Wedding Cake

31. A painted buckler. I carried it into the wedding. For those who are curious, the text on the buckler is not period. It is, instead, made of Tengwar and written in Sindarin (one of the Elvish languages from J.R.R. Tolkein’s Middle Earth stories). The text reads “loving twin souls” and “eternity”. Note: I did not make the buckler (which was rehomed to us from a heavy fighter who could no longer fight due to chronic shoulder injury), I simply painted it.


A painted buckler

A painted buckler

32. My wedding jewellery. Namely a strand of  black pearls, strung on silk, using a  toggle clasp.

A photo of me which displays my wedding jewellery

A photo of me which displays my wedding jewellery


33. A naalbinded phone pouch.

Naalbinded pouch

Naalbinded pouch for my love’s phone

34. Turks-head knot balls. I gifted these to Stegby a while back so the canton can build a children’s play box. I don’t currently have a photo.

35. Naalbinded bag. I make a lot of bags and pouches, it seems. This one became my token display area.

36. Bone pendant. This was a wedding gift for a couple of friends. This pendant was quite challenging due to the intricacy of the design.

Bone pendant featuring knotwork

37. Cider. My dear husband has taken to brewing his own cider, and so I have dabbled alongside him. Chief among my accomplishments is a dry pomegranate cider (yum).

38. Mead. I managed to find a period recipe for “weak mead”, which I have used, drank, then used further as a base for…

39. I am unsure what to name this drink. It may be considered a melomel, or it may be considered an ale: I used a weak mead recipe as a base and added barley. The result was dry, with a lemony flavour and a lingering but not unpleasant aftertaste in the back of the throat. I may try it again sometime.

40. Sekanjabin. This is a period Middle Eastern drink of  vinegar and sugar, heated until it becomes syrupy, and used as a cordial. I use red wine vinegar, but my father tells me it’s quite nice using apple cider vineger.

41. Embroidered handkerchiefs. Carrying tissues around at an event is (while convenient) something that detracts from authenticity. To this end, I have embroidered some handkerchiefs so that I’m not dropping tissues whenever I happen to have a runny nose at an event.

42. Illumination.  This was the product of an A&S class at this year’s Great Northern War.

Illumination

Illumination

43. Pilgrim bag for my father. Having at some stage read about Elizabethan era stitching techniques, and having a father who is about ready to entrust himself to the SCA and who accompanied me to Great Northern War, I decided he needed a pilgrim bag to put his feasting gear into. You can see the bag in the background of the below image. All fabric edges have been folded into a hem and secured with a running stitch, then seams have been whipstitched. I decided that, as the fabric I was using was unbleached calico and the stitches would be visible anyway, I would make the stitches become a feature of the bag. All stitching has been done in blue. I also followed this pattern with the strap, making the strap a long tube and placing the seam for the strap uppermost and in the middle rather than on one of the edges. I think this will probably add long term strength to the strap also.

Dad

My father. Note the bag on the table next to him.

That’s it for the moment. I’m so close to my 50! I do have a few projects on the go at the moment… one crewel work embroidery, a splitstitch embroidery, a blackwork collar, a girdlebook, and a carved spoon, which means that once they’re done, I have only two more items to manage for my list.