It’s been quite some time since I blogged here, and I haven’t been going to many events due (mostly) to time constraints, but that doesn’t mean that all has been silent on the A&S front. This being AS 49, I decided I need to get up and moving on my 50 things project, and to do this, I need to get up to date with my list. I previously was at Breadth challenge #27, so here’s my list continuing on:
28. My songbook has now expanded to include 55 songs, some of which are period and some not. This has been a depth challenge for me (and will continue to be ongoing… there are a lot of songs available and a lot of pages in my songbook which are yet to be filled in.) I’ve got a YouTube channel where I’m gradually adding content. Due in part to bad speakers, another part to poor microphones, and a third part to the fallibility of my vocal cords, the sound is not always the best, but I believe it’s probably sufficient for other bards to pick up a tune from what I’ve posted. You can listen to me on this channel: https://www.youtube.com/user/RevKristine
29. My wedding dress. You’ve already seen the fabric, here and here… the final product was entirely hand stitched to my own design. It didn’t entirely work the way I wanted, due majorly to my weight (and size) jumping all over the place while I was making the dress. However, I’m (mostly) satisfied with what I made, and apart from some minor freakouts on the day and the groom having a broken leg (that’s a story unto itself), the wedding went well. I’ve since used the dress at an event, and now that I am fatter, it fits me a lot better.
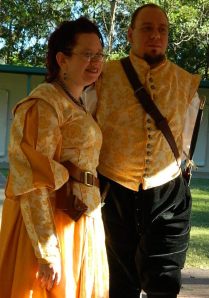
My wedding dress, from my own design.
30. My wedding cake. This was made entirely of gingerbrede with marzipan icing. I will admit to buying the pink flowers on the cake, but am particularly proud of my own marzipan roses.
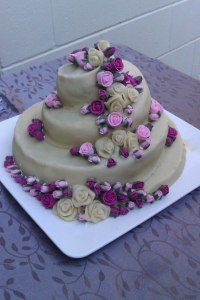
Wedding Cake
31. A painted buckler. I carried it into the wedding. For those who are curious, the text on the buckler is not period. It is, instead, made of Tengwar and written in Sindarin (one of the Elvish languages from J.R.R. Tolkein’s Middle Earth stories). The text reads “loving twin souls” and “eternity”. Note: I did not make the buckler (which was rehomed to us from a heavy fighter who could no longer fight due to chronic shoulder injury), I simply painted it.
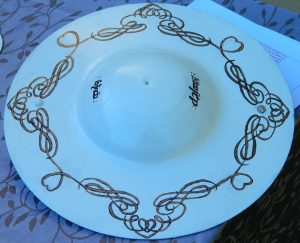
A painted buckler
32. My wedding jewellery. Namely a strand of black pearls, strung on silk, using a toggle clasp.
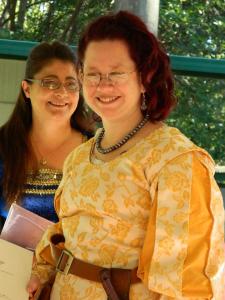
A photo of me which displays my wedding jewellery
33. A naalbinded phone pouch.
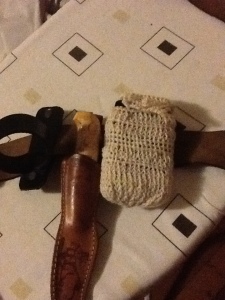
Naalbinded pouch for my love’s phone
34. Turks-head knot balls. I gifted these to Stegby a while back so the canton can build a children’s play box. I don’t currently have a photo.
35. Naalbinded bag. I make a lot of bags and pouches, it seems. This one became my token display area.
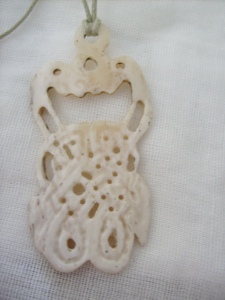
36. Bone pendant. This was a wedding gift for a couple of friends. This pendant was quite challenging due to the intricacy of the design.
37. Cider. My dear husband has taken to brewing his own cider, and so I have dabbled alongside him. Chief among my accomplishments is a dry pomegranate cider (yum).
38. Mead. I managed to find a period recipe for “weak mead”, which I have used, drank, then used further as a base for…
39. I am unsure what to name this drink. It may be considered a melomel, or it may be considered an ale: I used a weak mead recipe as a base and added barley. The result was dry, with a lemony flavour and a lingering but not unpleasant aftertaste in the back of the throat. I may try it again sometime.
40. Sekanjabin. This is a period Middle Eastern drink of vinegar and sugar, heated until it becomes syrupy, and used as a cordial. I use red wine vinegar, but my father tells me it’s quite nice using apple cider vineger.
41. Embroidered handkerchiefs. Carrying tissues around at an event is (while convenient) something that detracts from authenticity. To this end, I have embroidered some handkerchiefs so that I’m not dropping tissues whenever I happen to have a runny nose at an event.
42. Illumination. This was the product of an A&S class at this year’s Great Northern War.
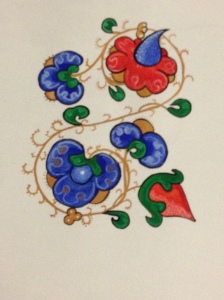
Illumination
43. Pilgrim bag for my father. Having at some stage read about Elizabethan era stitching techniques, and having a father who is about ready to entrust himself to the SCA and who accompanied me to Great Northern War, I decided he needed a pilgrim bag to put his feasting gear into. You can see the bag in the background of the below image. All fabric edges have been folded into a hem and secured with a running stitch, then seams have been whipstitched. I decided that, as the fabric I was using was unbleached calico and the stitches would be visible anyway, I would make the stitches become a feature of the bag. All stitching has been done in blue. I also followed this pattern with the strap, making the strap a long tube and placing the seam for the strap uppermost and in the middle rather than on one of the edges. I think this will probably add long term strength to the strap also.
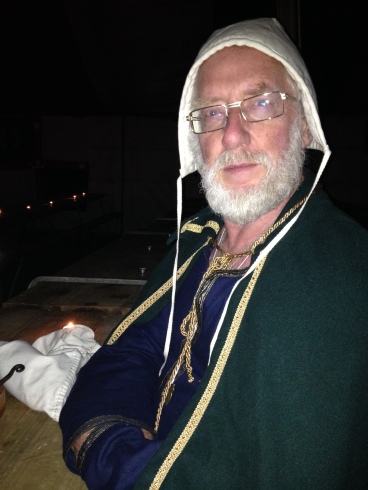
My father. Note the bag on the table next to him.
That’s it for the moment. I’m so close to my 50! I do have a few projects on the go at the moment… one crewel work embroidery, a splitstitch embroidery, a blackwork collar, a girdlebook, and a carved spoon, which means that once they’re done, I have only two more items to manage for my list.

 July 18, 2015
 Wordy Girl


